Review and gear list for Lenin Peak (7134m)
Author: Alexandr Moroz
Mountain guide on Elbrus, Kazbek, Ushba, Lenin Peak, Khan-Tengri and other peaks of the Pamirs, Tien Shan and Caucasus.
Experience in mountaineering: 8 years, work as a mountain guide: 5 years.
2nd place in mountaineering, ascents up to 5B category in the Caucasus, Pamir, Tien Shan.
Postgraduate student of the School of Mountain Guides of Kyrgyzstan KMGA/IFMGA.
A short description of the mountain’s features
Lenin Peak is the most accessible seven-thousander among other peaks above 7000 m, which are called the Snow Leopard of the USSR: Khan-Tengri, Pobeda Peak, Korzhenevskaya Peak, Communism Peak. The accessibility of this peak is due to the presence of camps equipped with comfortable conditions for staying at the foot of the mountain, up to Camp 1, where there is gas, a generator, a kitchen and stationary tents. The road laid in Soviet times, which leads directly to the Base Camp on the Achik-Tash glade at an altitude of 3600 m, is also another condition for the accessibility of the mountain compared to other peaks, which can be reached only on foot, often without a helicopter.
What should you be prepared for on your first seven-thousander? Comparisons with winter 5000 m.
Before going to Lenin Peak, it is advisable to practice winter ascents in the Caucasus. For example, Kazbek, Elbrus. The climatic conditions on the winter 5000 are close to the conditions that you will encounter on the summer Lenin Peak. From the point of view of autonomy and independent life on the mountain, winter Kazbek is more suitable than Elbrus. Although it is lower, it is much more difficult to get to the mountain in winter than to Elbrus. No “ropeways”, horses or other benefits of civilization. Also, the technical complexity of the terrain is more similar to Lenin Peak. Moraines, steep ridges, glaciers with an abundance of cracks and bergschrunds. You need to be able to overcome all this, because on Lenin Peak, without these skills, you will not be able to safely reach even the second camp!
There is an important nuance that many do not take into account or simply do not know when preparing for their first seven-thousander: At high altitudes, at slightly negative temperatures, you will freeze due to the outflow of blood from the periphery to vital organs. This is the body’s protective reaction to the altitude. From personal experience, at -20 on the approach to the top of Lenin Peak (until the sun appeared) – I felt colder than on Winter Elbrus at -39 at an altitude of 4100 m. Therefore, it is worth paying great attention to equipment!
Temperatures at Lenin Peak in summer fluctuate from -13 to -30 at the top of the mountain. There are also abnormal cold spells, but they are difficult to predict. Due to climate change on the planet, each season in the mountains is different from the previous one. According to my observations, in winter in the Caucasus at 5000 it has become much warmer.
Another important factor that not everyone knows about is the scorching sun at high altitudes. Sounds strange, doesn’t it? If it’s high, it’s cold? But it’s not that simple, believe me) For example, during the day, on the way to the Second Camp at an altitude of 5,300, the sun reflected from the slopes of the “Frying Pan” is so scorching that some people get heat stroke. Once the sun goes behind the mountains, everything falls into place. The cold sets in)))
Let’s begin.
Shoes
It should be divided into three sections.
1. Footwear for recreation in the Base and First Camps. Both regular rubber slippers and a more reliable option – Crocs – are suitable for this purpose. They are more reliable and multi-tasking, for example, you can walk in them on light snow in woolen socks.

2. Trekking shoes.
Here the main criterion is weight and functionality. Trekking shoes are needed on the mountain during the first acclimatization period near the Base Camp, for the trail to Camp 1 and acclimatization hikes to Domashnyaya or Yukhina Peak near the first camp.

Often all these exits can be done in trekking shoes, except in cases where there is snow on the slopes. In this case, you need to wear gaiters ( snow protection) or high-altitude boots.

Disadvantages of boots on the first acclimatization trips:
- It’s hot in them
- Wear of the sole. The sole of high-altitude boots is thin and wears out quickly with regular use.
The main requirement is that the shoes should be for the mountains. La Sportiva and Scarpa have a good selection.
3. High altitude boots.
- Three-layer boots

We recommend the 8000+ series high altitude mountaineering boots. The boots are designed for extreme temperatures.
- La Sportiva Olympus Mons
- Zamberlan 8000 Everest
- Scarpa Phantom 8000
+ very warm and reliable
+ dress quickly
– price
– it’s hot on the approaches and descents to the high camps (it’s better to be warm than to freeze your feet)
- The next option is the 6000 series boots.
It is less warm, but sufficient for summer 7000+.

- La Sportiva Spantik,
- Zamberlan Denali,
- Scarpa Phantom 6000.
- And the third option. Double plastic boots.
In high-altitude camps and during assaults, use together with insulated full shoe covers. – The least reliable option.
The warmest boots in this series:
Koflach Arctics Expe

Other boots of the Scarpa Vega class, etc., only come with insulated shoe covers.

All boots are selected 1-2 sizes larger than yours. On the descent, the foot should not rest against the toe, otherwise you risk losing your nails.
Clothes.
Third layer. Down jacket. PrimaLoft®

or

Jacket

Compared to PrimaLoft®, down is warmer, but it is lighter than synthetic insulation and can get wet. When wet, down stops warming, but PrimaLoft does not.
For Lenin Peak, it is better to take a warm down jacket. It will be needed when storming the summit and at bivouacs. It is better to take expedition warm down jackets of trusted brands, this is a guarantee that you will not freeze and the thing will not fall apart.
Examples:
- MILLET Expert Down Jkt
- The North Face Himalayan parka Summit Series™
- BASK KHAN TENGRI
Trousers.

Unlike the jacket, it is better to take pants made of PrimaLoft®. They work better when walking and keep you warm when wet from snow or condensation. They are used at stops, transitions in the cold, at night and when storming the summit. If you have high-altitude boots, you can take shorts made of PrimaLoft®.
Third layer. Membrane.
The top layer should be waterproof and wick away moisture. We recommend jackets with a good membrane.
For example

Jacket

It should have opening ventilation holes, without them you will sweat in hot weather, and the membrane will not cope with such an amount of moisture.
Trousers

It is advisable to choose the so-called “self-dumping” ones. Their main advantage is the ease of putting on. No need to take off crampons or shoes. We also recommend choosing clothes from trusted brands.
Second layer. Heat retaining.
Polartec®
Top

Down

Polartec® This is a material that has good thermal and moisture removal properties. Polartec® has many types and a wide range of applications, it is used to make the middle layer of mountain clothing, gloves, balaclavas, hats, etc. For the middle layer, you can use Polartec Classic 200. The numbers are the density of the material. You can also use other types.
Base layer. Thermal underwear.
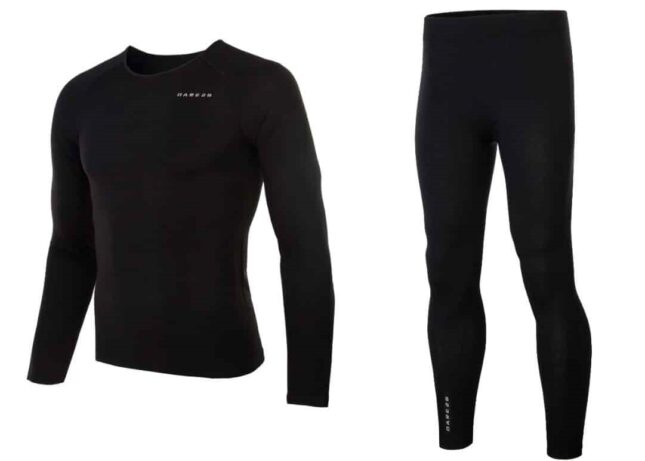
The main task is to absorb and remove moisture. Dry quickly.
On Lenin Peak, take 2 sets of basic thermal underwear – one change. And one insulated one made of Polartec®. For example – Polartec Power Stretch or similar. This is an additional insulating layer. It can be combined or interchanged with others. For example, up to Camps 1 and 2, it is comfortable to use a standard base layer + membrane or insulation (depending on the weather). And above Camps 2 and 3, it is better to wear insulated thermal underwear or for the night.
Hat

Materials::

The main difference between a mountain hat and a regular one is the material, the cut considering that you will be wearing a helmet on top (there should be no pom-poms or any furry edging, etc.). Often there is a layer in the forehead, ears, and back of the head made of Polartec®. The upper part is not hemmed for ventilation because moisture goes up.
MILLET makes good hats. Or you can choose from other brands.
Balaclava, balaclava or combination.


Combined option. Hat and mask.
In winter and on Lenin Peak I used a balaclava and a separate mask from the Russian company Red Fox made of Polartec® windblock material.

They are windproof and help with strong wind and cold. I use this mask only in wind, snowfall and strong cold. BASK also has some good stuff.
Balaclava
The choice of a “balaclava” is also worth paying attention to. Perhaps you carry it in a backpack and will not take it out, but if there is snow, wind and scorching sun – the thing is convenient and irreplaceable. There are several options.
An important point is a ventilation hole in the mouth area or a removable “muzzle”. It is also important that the material breathes. Otherwise, it will freeze, and you will not be able to breathe. In any case, the moisture that comes out with your breath will remain on the material and freeze, but if the material is bad, it will be hard for you to breathe – you will simply take it off and risk frostbite on your wet face.
Walking gloves.

Materials::
It is desirable that walking gloves have fingers, not mittens. They are used for handling equipment. I use Polartec Classic 200. You can also take Polartec® windblock or Windstopper. This is a more reliable option. The advantage is that they are windproof. You should have spare gloves in case the main ones are lost or get wet.
Insulated mittens or “over-the-tops”

There are 2 types. The first is just membrane mittens without insulation. They are not suitable for 7000. You need to consider the option with insulation. Synthetic is better. Down is warmer, but getting wet remains a problem.
You should fit them loosely over your running gloves. Your hand should not be cramped. If your hand is squeezed, it will lead to blood flow disruption and, as a result, frostbite.
Headgear for Base and First Camp.
Besides sunscreen, you will need additional protection from the Pamir sun.
Cap with sun protection

BUFF

Tourist hat

Socks and underwear
Trekking socks.
Technologies::
- THERMOLITE®
- LYCRA® FIBER and others.

There are a great many varieties, as well as areas of application. The main task is thermoregulation, reducing chafing (the appearance of calluses), moisture removal, etc.
You need to have several thin walking pairs for initial acclimatization, 2-3 warmer ones for going to high-altitude camps. I can recommend the MUND brand, they have a fairly wide range.
Underwear

To avoid chafing on the active part of the route, it is better to choose a trekking series.
Glasses

Glasses for climbing Lenin Peak must be of category 4 protection, for mountains.
You should also buy a “on nose cover” – a very useful thing.

Ski mask.

Not dark. 2-3 protection category. It should be visible at night with a flashlight and in snowfall. The main task is to see the path in bad weather, when glasses do not help.
Headlamp

There is also quite a wide choice among mountain lanterns. I prefer Petzl. Power and equipment are a matter of taste. Example: Petzl TIKKINA in the picture.
Equipment for camp site.
Backpack, duffel bag.


If you plan to use cargo delivery services to the first camp or higher, it is better to take a Large trunk of 100 liters or more. In this case, you can take a backpack from 50 liters. Depends on the volume of your things. With it, you will go to the 2nd, 3rd camps and to the assault. If you are not sure that your equipment will fit on the 50-liter exits, take more. You can also take an assault backpack for the assault exit. Small – 20-30 liters. If you are ready to carry it up)
Tent.


DAC produces some of the world’s best tent frames, clamps and connectors. Self-installation of camps 2 – (5400m), 3 – (6100m), 4 – (6400m). The tent must be designed for strong winds and snowfalls. By season 4 season or winter.
For 2-3 people:
- Marmot Thor-2P;
- The north face mountain 25.
– Price
+ There are many advantages. The main ones are a very reliable and wind-resistant design.
Everything is thought out to the smallest detail. It is possible to open and close the ventilation from the inside.
A simpler 2-seater option: Marmot Fortress 2P
Single class tent SOLO
Brands: Marmot, The north face, Mountain Hardwear, Husky etc.
Sleeping bag.

You need to take a winter sleeping bag or you can take a slightly colder one, but sleep in warm thermal underwear, for example. Down is better. If it is hot, you will uncover yourself, but if it is cold at 6000, you will sleep in only thermal underwear, like in a home crib). About the choice of material – synthetics or down? A light down sleeping bag is better. The lower comfort temperature is -15. In the clothing section, I described several nuances of materials. I will repeat a little:
Synthetics:
+ Warms when wet. There is condensation in the tent that gets on the sleeping bag.
– Weight and volume. This is the main problem with synthetic sleeping bags.
Down:
+ warmer than synthetics
+ smaller size and weight than synthetic counterparts
– condensation issue.
During the program, there is an opportunity to dry the sleeping bag in the Base and First Camp. Also in Camps 2, 3, 4 this can be done in sunny weather. During the winter programs of Elbrus, Kazbek and last year on Lenin, I used a budget synthetic sleeping bag.
Rock Empire Montana Regular:

+ budget
– huge))))
– heavy
Главной задачей в развитии альпинистского снаряжения в данное время – является максимально уменьшить вес с минимальной потерей прочностных и тепло свойств. Современные материалы позволяют выбрать снаряжение максимально подходящие под ваши цели или конкретное восхождение.
Down sleeping bags:
- Sea to Summit
- Mountain Hardwear
- The North Face
- Marmot
- Therm-A-Rest И т.д.
Rug
An important piece of equipment that deserves due attention!


Therm-A-Rest® RidgeRest® Solar
This is the warmest closed-type foam mat. Replaces 4 regular “Izhevsk” ones. Warm, reliable, long lasting.
You can also combine the thinner Therm-A-Rest® RidgeRest® Solar + NeoAir® XTherm™ (inflatable – Important: Not self-inflating!) The self-inflating mat is heavy, bulky and you will have to wait a loooong time for it to inflate to 5000 m.
Special equipment.
Dishes


For high altitude camps.
Burners are better:
- Jet boil
- MSR Reactor
- MSR Windburner
burners for making boiling water for freeze-dried foods. They are supplied with 400-500 gr plates.
If you plan to cook soups, etc. then you need to take systems suitable for this. Pots, etc. But it is better to wean yourself off “forest tourism” of all kinds of pots, pots for 10 in the mountains :)) In the Base, you are usually fed. No burners are needed there. You also need to take good gas at altitude. MSR, PRIMUS, at least KOVEA.
Namely 4-season gas Propane/Butane/Isobutane. At altitude and in the cold, bad gas, for example, Pathfinder, TRAMP, etc. – may simply not burn. As a result, you will get into trouble. Pay attention to this!
Thermos.

A 1 liter thermos without handles or other things that make it heavier. This volume is enough. You don’t need an extra cup, the one that comes with the thermos is enough. Trusted and reliable brands:
- Stanley
- Tatonka
- Thermos
Crampons.

They are selected directly to your boots and tasks. There are three types of crampons based on mounts:
- Automatic – for welted boots. Front and back bracket. Securely attached to the boot.
- Semi-automatic – designed for boots with a back welt only.
- Universal – suitable for any footwear.
Further technical configurations are different. Replaceable vertical teeth and mono-tooth – designed for ice and mixed routes. Horizontal teeth – for snow and soft ice. Further choice of model and company is a matter of taste. Model Petzl Lynx, transforms to any task – Automatic, semi-automatic, universal.
- Petzl
- Grivel
- Black Diamond И т.д.
Harness.

A safety harness with adjustable legs and a wide belt. Designed for mountaineering. You will put it on the Jacket and down jacket on the night of the ascent. For example:
- Petzl
- Black Diamond
- Mammut И т.д.
For Lenin, you can take an easy system Petzl Altitude.
Rope.

Also a matter of taste. One main rope, but preferably thinner than 10 mm – 9.1. Or two halves of 8 -8.5 mm. I use thin ropes both on Lenin and on technical routes – Ushba, etc. Dynamics. Depends on the route, tasks and number of participants. The need for a rope on Lenin Peak is on the glacier and a couple of sections on the route. Full-fledged jerks, like on rocks, are hard to find. Therefore, thin ropes are enough. If necessary, 8 mm 60 m can be folded in two – there will be a full double rope of 30 m.
Self-belay ropes.

As a full-fledged Petzl whisker for Lenin Peak, you can use a pair of Dyneema loops adapted for static self-belay ropes. Full-fledged ropes are needed on vertical routes with hanging stations, possible jerks, etc.
Carabines.

Muffed. 3-4 pcs. Automatic or magnetic muffs are not recommended. They will freeze and it will be difficult to open them. I use Petzl Attache, Spirit and SM’D SL carabiners. This carabiner has a special feature: the hole allows you to secure the TIBLOC or MICRO TRAXION to the carabiner with a cord.
Ice screw.

This is your self-belay on a slope, glacier, and also in case a team member gets into a crack.
- Petzl LASER SPEED LIGHT
- Black Diamond Ultralight
Safety and descent device (Glass)
For belaying and descending along the railings on sections of the “Knife” route or taking off on the glacier. Better with a ring for organizing belay in the autoblock mode. For example:
- Petzl Reverso 4
- ATC-Guide – Black Diamond Gear
Jumar or TIBLOC.


For the area above 3 camp “Knife”
- Petzl ASCENSION – full-fledged clamp with handle. Weight: 165 g.
- Petzl TIBLOC – Ultra-light and compact clamp for rope ascents, for hauling systems or as a replacement for a grappling knot in self-rescue. Weight: 35 g.
Helmet.

Do not neglect your safety and do not follow advice like and stories: On Elbrus they go without helmets. On Lenin too, etc.! This is a big misconception and even stupidity – I assure you. No one has cancelled falling into a crevasse, a flying stone, a piece of ice or just an unfortunate fall. Take care of your head, it still needs to think:))
Ice axe.

There are no steep sections of ice, so a regular ice axe is enough. I like the curved models:
- Petzl SUMMIT
- Petzl EVO
Easily and securely fit into the firn (No rubber elements on the handle). Durable alloy. Due to the bend, if necessary, you can climb ice at 45 degrees.
Trekking poles.

The poles should be collapsible (3 sections) with snow, wide rings. In my opinion, the first place is taken by poles of the Black Diamond company.
Use high-quality and proven equipment.
Finally, I would like to wish you successful ascents, safe descents and good luck in the mountains!